
Over the past few months I’ve posted a few how-tos, but none of these series of helpful hints has been as close to my heart as this one. As a self-described “Full time-time DM, part-time illustrator”, I spend most of my days sketching & painting. I’ve learned many shortcuts & methods to help expand my creativity when it comes to painting, and I’ve often wondered if similar techniques would be useful for a DM. Join me as I apply some basic creativity to dungeon design!
The Scribble Method
This is a relatively common practice for artists who want to exercise their mind’s ability to extract shapes from chaos, and it’s generally pretty fun to do in your spare time. You just scribble loosely on a piece of paper, or in my case, in Photoshop with a graphic tablet, and try to find shapes you could expand upon. You then darken the lines you like, and start to form a face, character, creature, or even a landscape from these shapes. Eventually this chaotic mess of scribbles turns into something polished, and can become the foundation of a whole new idea.
All too often, I see pictures from people’s tabletop RPGs featuring the players entering a HUGE circular room. This is occasionally appropriate, but caves in real life are so much more interesting than just large rooms with narrow passages in between. Implementing this scribble practice into Dungeons & Dragons is not only straightforward, but fast & easy… so let’s get started!
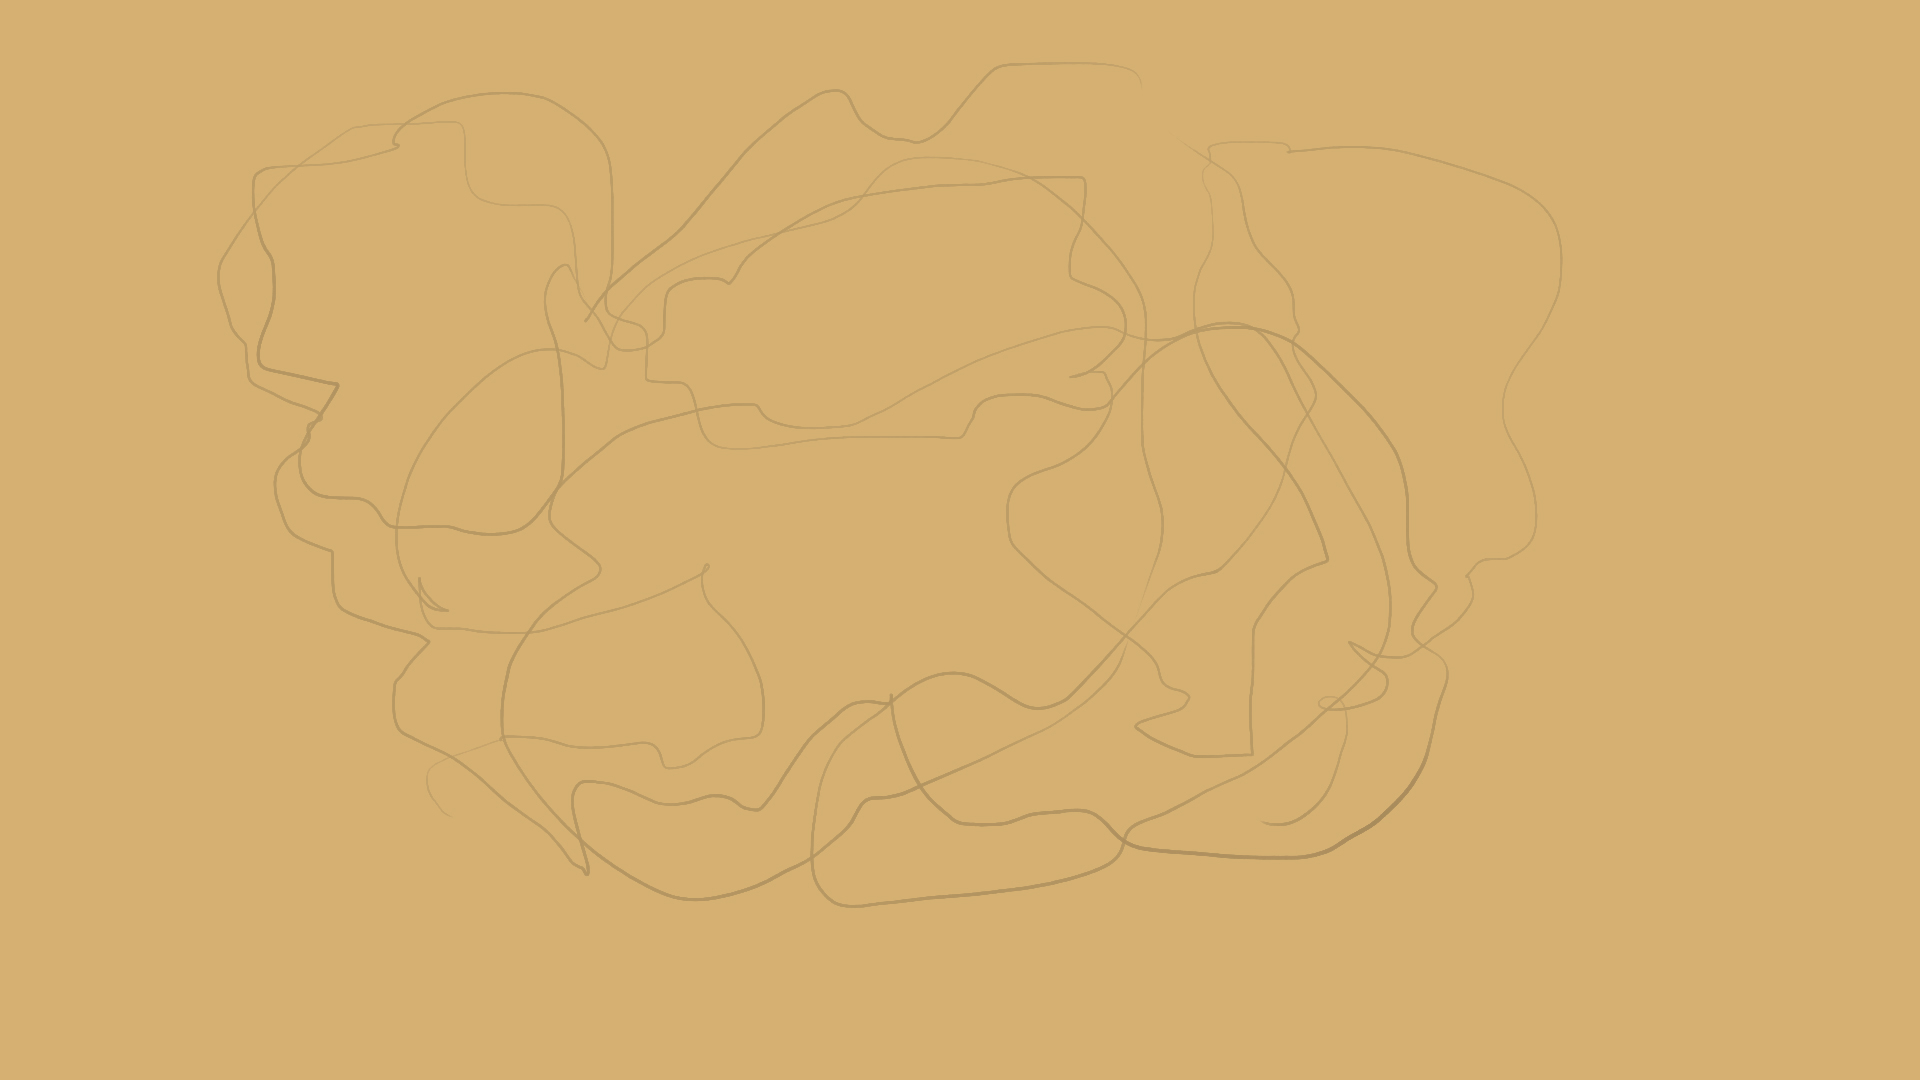
STEP 1- Scribble!
With a pencil on paper, loosely sketch a bunch of scribbles! Be sure to venture out from the center, and include both jagged and smooth lines. Don’t be afraid to go to the corners of the page.
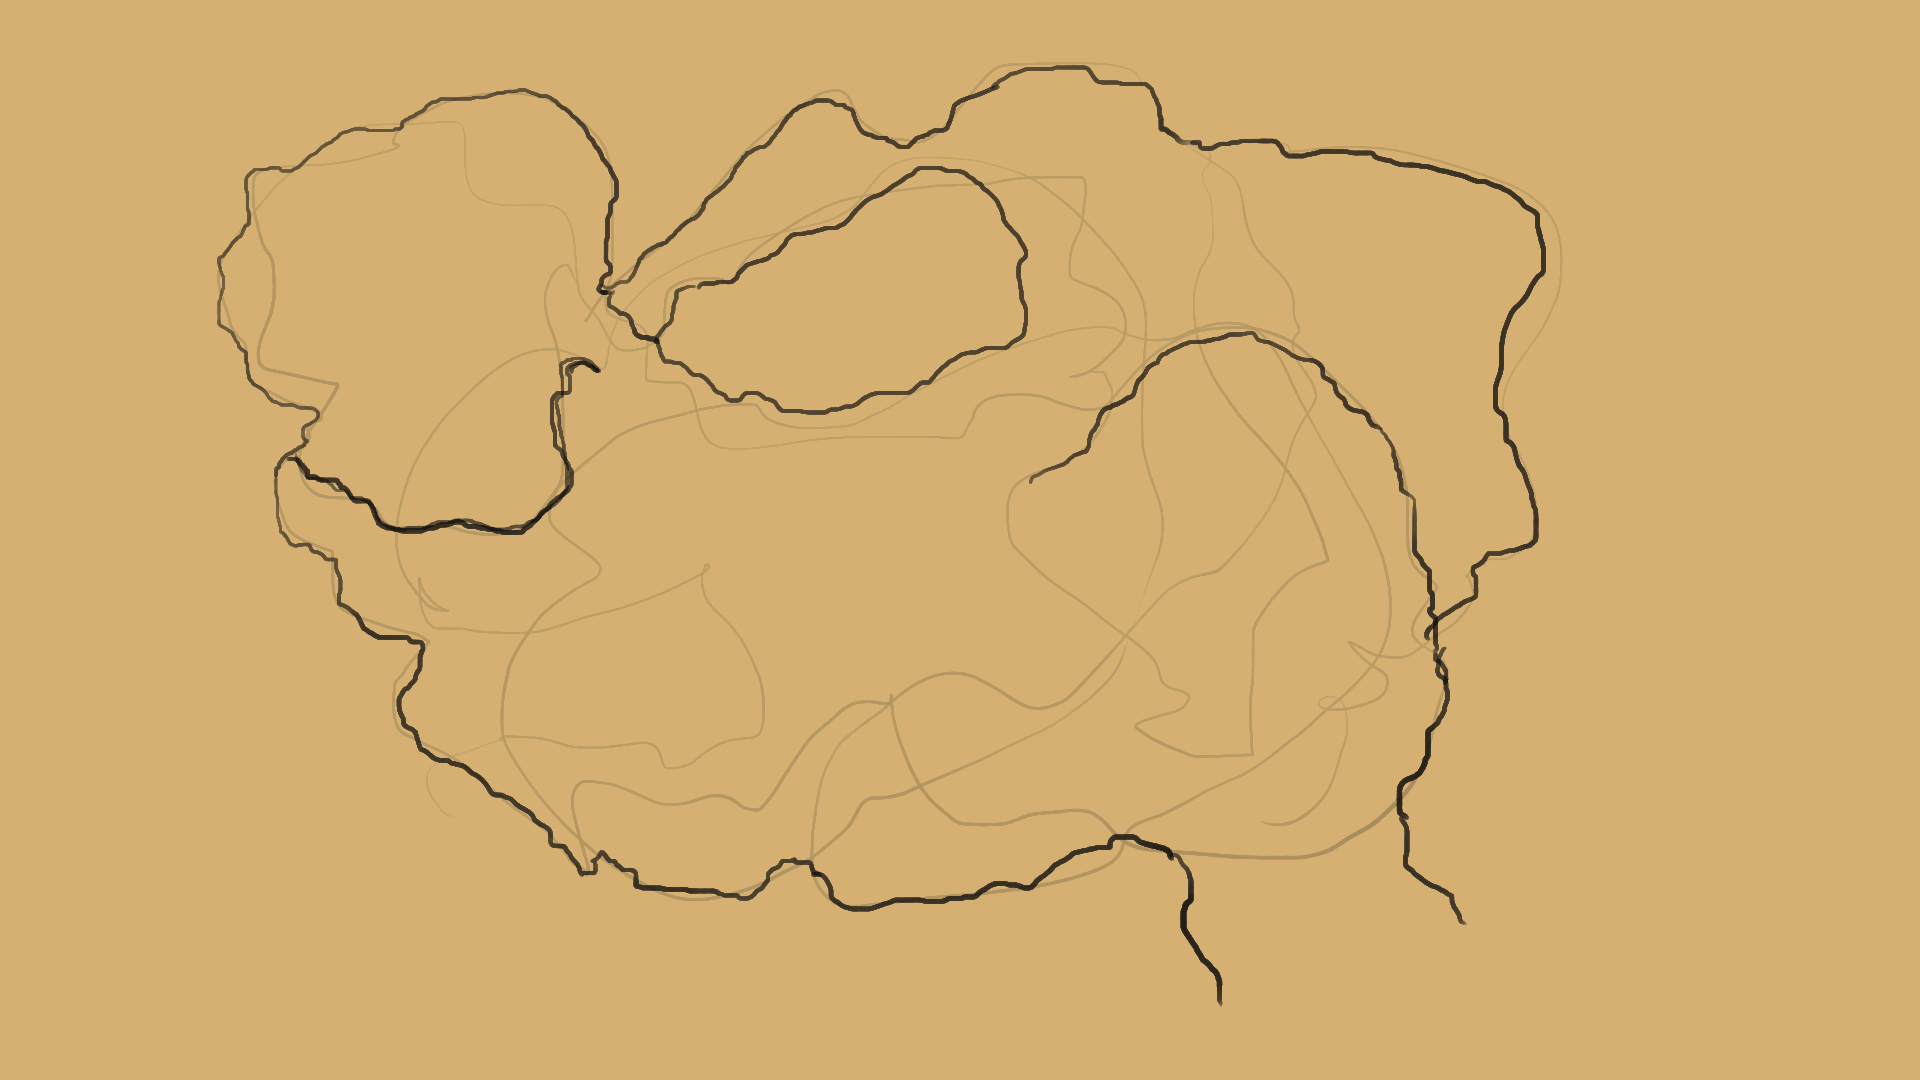
STEP 2- Identify
Now that you have your initial scribble, focus on the lines that you like –keeping the flow of the room in mind. Try to find interesting shapes and darken them with a pen, or a 100% opacity brush in Photoshop.
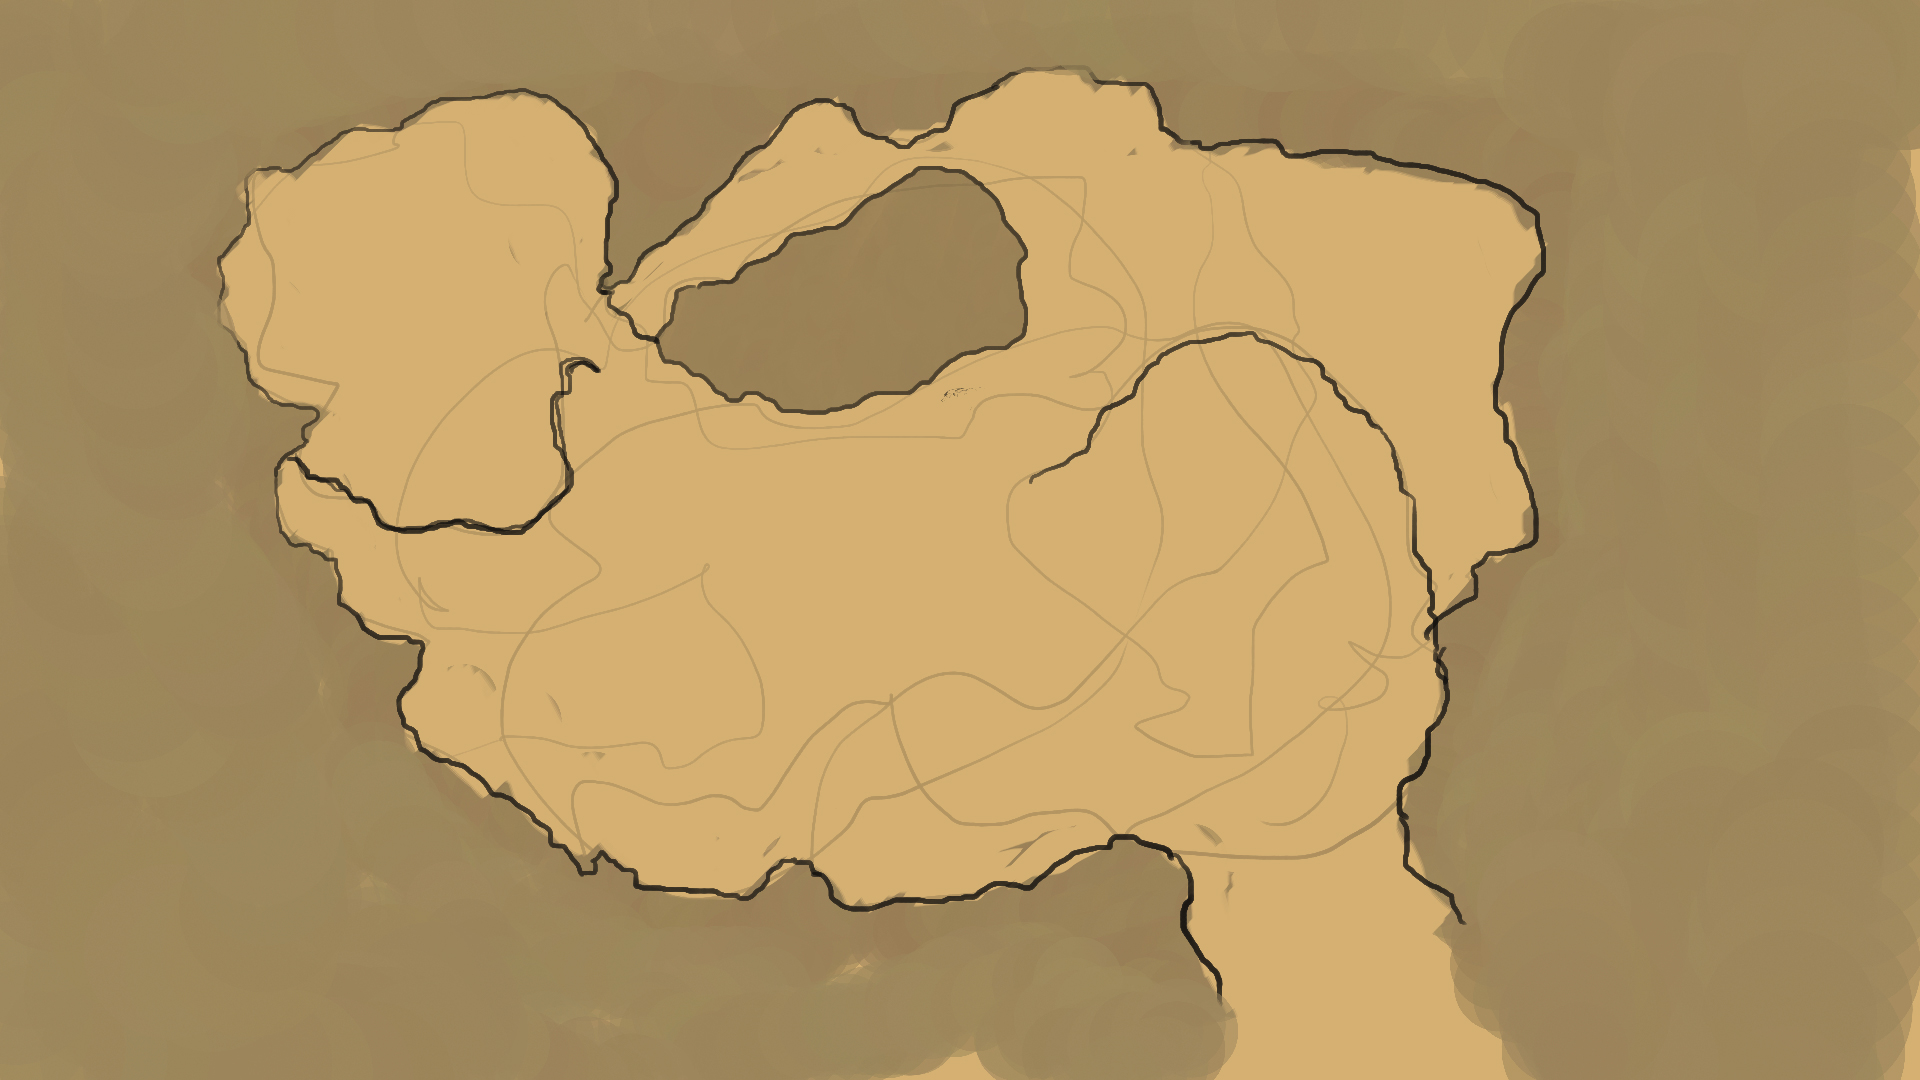
STEP 3- Create Sections
Now you can start to section areas off into rooms, walkways, and cliffs. I’ve darkened the inaccessible areas. You can crosshatch with a pen or pencil along the cave walls and in all other inaccessible areas.
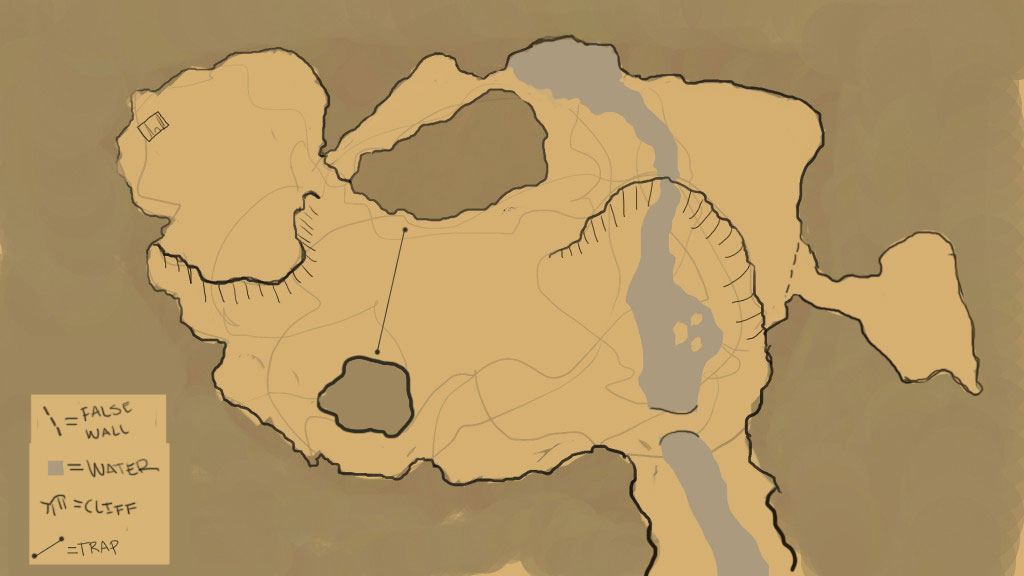
STEP 4- Add more stuff!
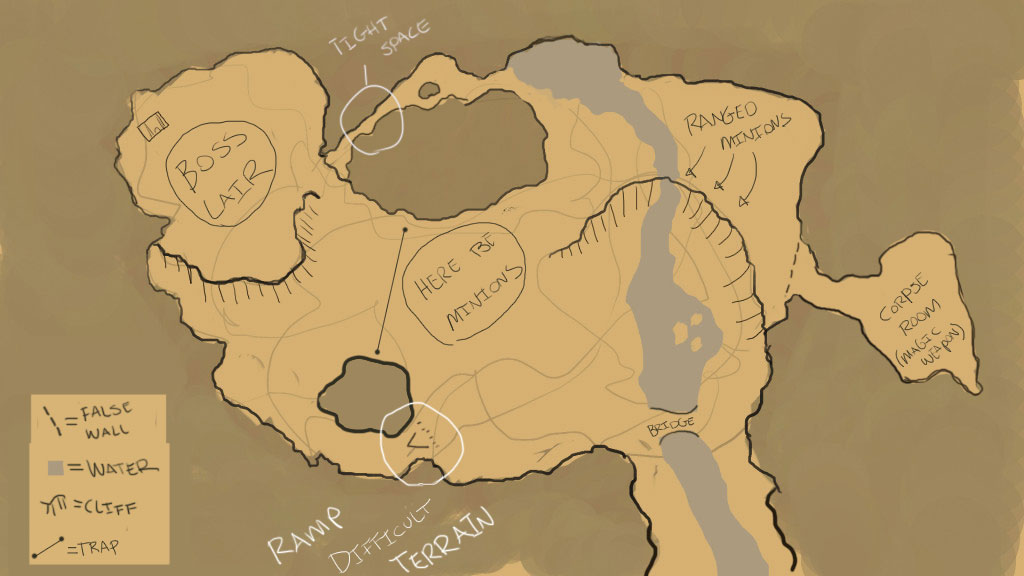
Now that you have what looks like a functional cave room, it’s time to add some cool little touches! I’ve added a stream that will hinder movement, some false walls, traps, and cliff edges. You can use different colored pens to add these features, and the stream here could easily be a lava flow, or even sewer run off… at this point it’s whatever you want it to be!
(also a horribly drawn treasure chest)
STEP 5- Finishing Touches
What’s a cave without a room full of rotting corpses and some seriously difficult terrain? Here I’ve added the finishing touches, general NPC placement, and a few little extras!
Alternative -Add straight lines!
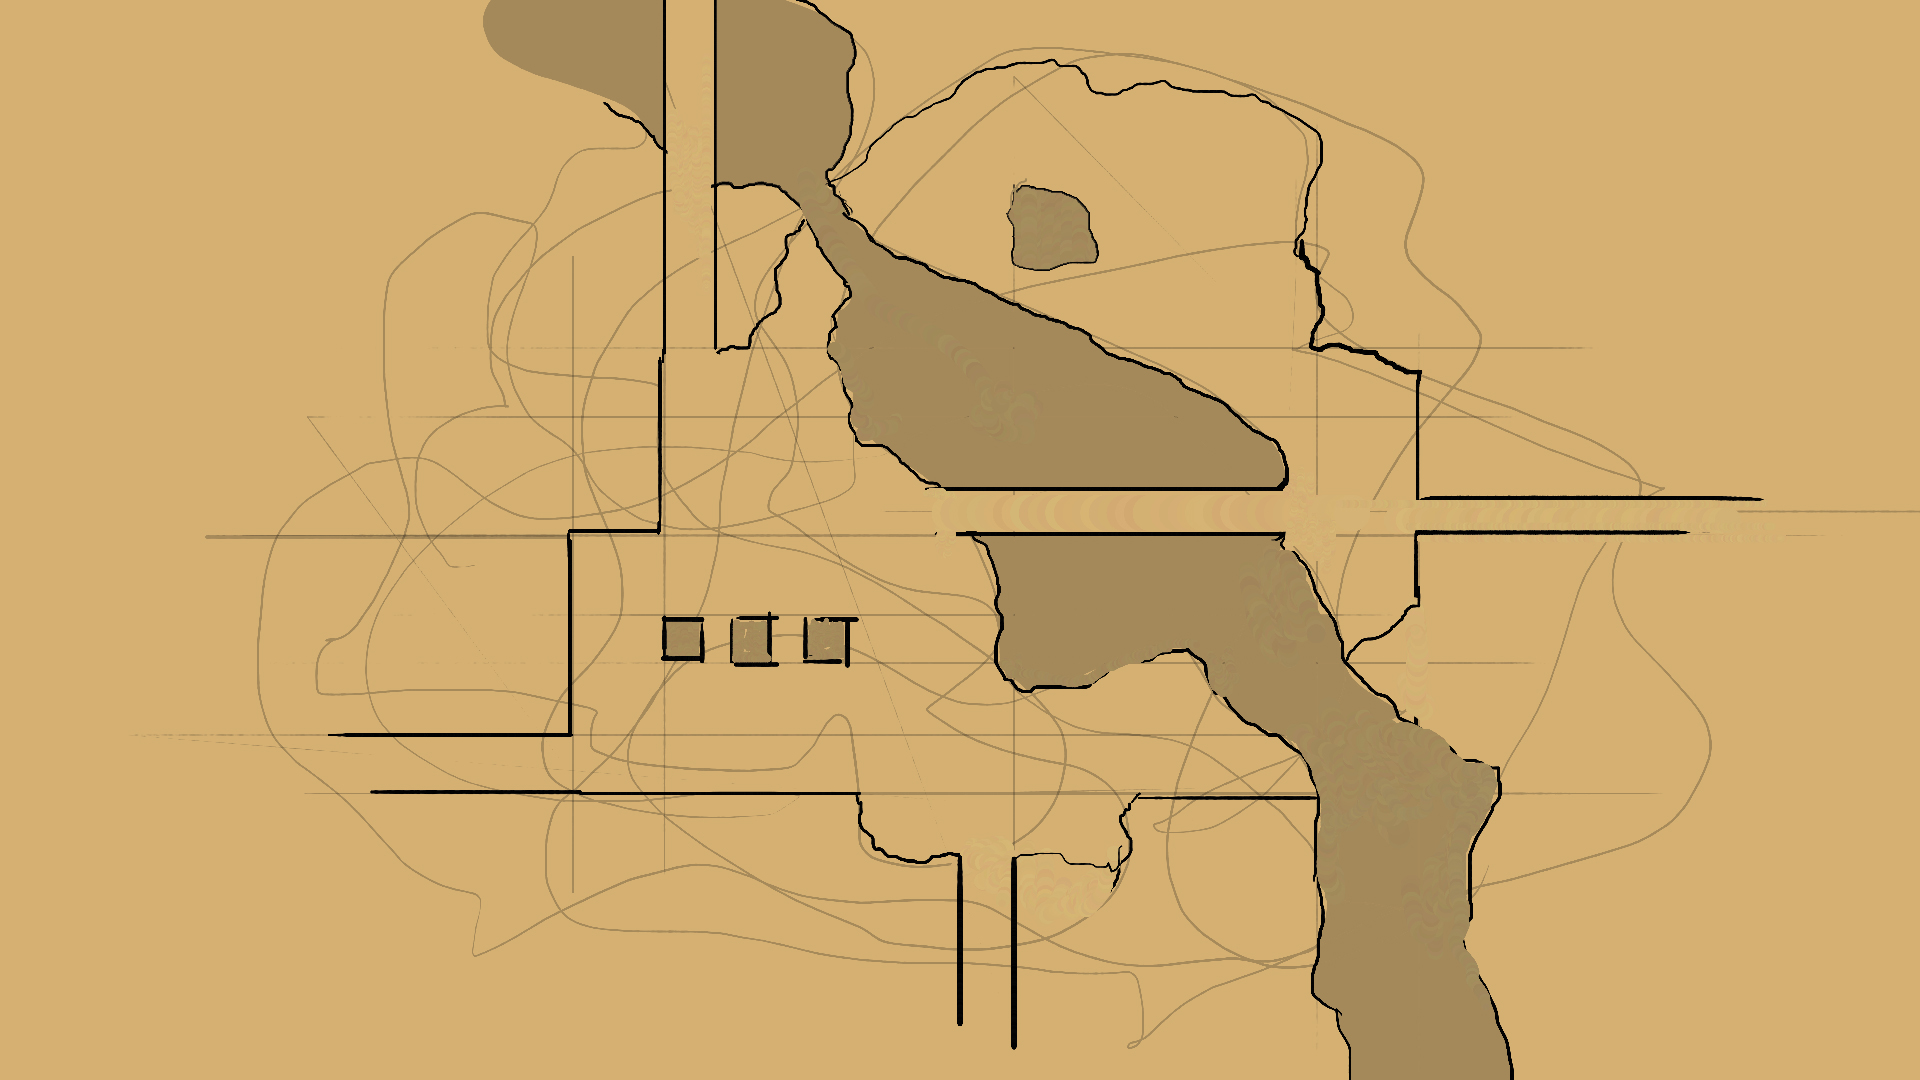
Sure, caves are fun, but you will eventually need to explore other areas like dungeons, slum streets, or castle ruins. For these kinds of encounters, a purely organic scribble doesn’t make much sense. In this case, after step 1, you can take out your ruler and start putting down some straight lines with your light pencil. Make sure the lines are evenly spaced, or use graph paper.
More hints!
Below is what could be a canyon and river with some structures carved out of the sides, or perhaps a ruined bit of town –but I think the first thing we obviously see is a dungeon. The darkened area is a chasm with a few bridges stretched across it. There are also a few pillars in the large room to the bottom left.
I hope this was helpful! I’m already whipping up part two, so be sure to come back and find it. If you create something using this method, please leave a comment below with a link to your creation, we would LOVE to see it! If you have any ideas on how this method could be improved, please let us know in the comments.